LEGO Blog
All the latest Brixbox news, straight from the team.
Acrylic Assembly Guide for LEGO Display Cases
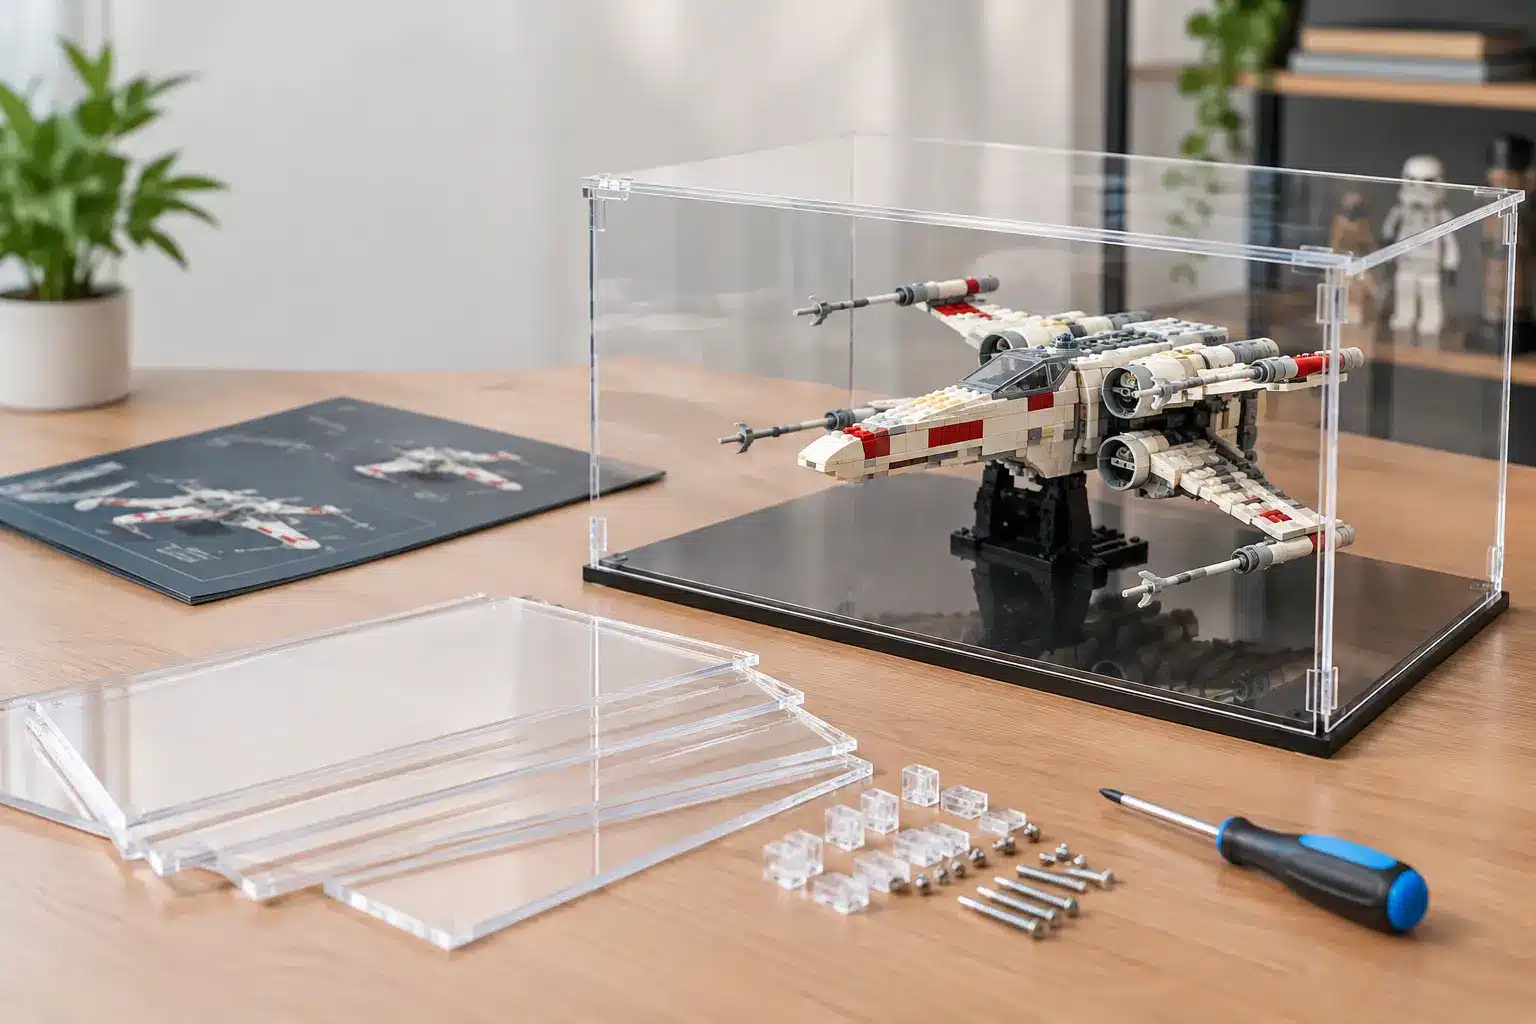
A premium display case should make the final stage of your build feel just as satisfying as placing the last brick. This acrylic assembly guide is designed for collectors who want crisp panels, secure joins and a display that gives their LEGO set the presentation it deserves – without fingerprints, scratches or unnecessary stress.
Acrylic cases are precision-cut to create a clean, near-invisible barrier around your model. That polished look relies on careful handling from the moment you open the box. Take your time, prepare the space properly and assemble the case before moving in your completed build whenever possible.
Before You Start: Prepare a Collector-Worthy Workspace
Choose a large, clean, flat surface with good lighting. A dining table or clear workbench is ideal. Avoid carpeted floors, uneven shelving and any area close to a sink, open window or enthusiastic pet. Acrylic can pick up static-charged dust surprisingly quickly, so a calm, clean room pays off.
Wash and dry your hands thoroughly before handling the panels. Hand cream, oil and moisture can leave marks that only become obvious once the case is lit or viewed from an angle. If you have soft cotton gloves, they are useful, but clean dry hands and a microfibre cloth are usually enough.
Lay out every panel before removing protective films. This gives you a chance to identify the base, back panel, side panels, top and any printed elements. For themed cases, the printed background or base is part of the presentation, not simply a structural piece. Keep it facing upwards and clear of anything that could mark the finish.
Do not rush to peel every film away at once. Protective layers are there for a reason. Leaving film on areas that will not be handled until later helps keep panels pristine while you position the rest of the case.
Acrylic Assembly Guide: Build the Case in the Right Order
The exact panel layout can vary between display case designs, particularly for large UCS ships, tall Technic models and cases with printed backdrops. The principle remains the same: build from the base upwards, keep pressure even and never force a panel into place.
Start with the base and rear panel
Place the base on your prepared surface with the display side facing upwards. If it has a printed design, check its orientation before adding anything. The strongest visual result comes from lining up the set with the intended scene, whether that is a starfield behind an X-wing or a dramatic backdrop for a Hogwarts display.
Fit the rear panel first where the design calls for it. Hold it close to its lower edge and guide it gently into the relevant groove or connector. Do not bend acrylic to make it fit. If there is resistance, stop and check that the panel is the correct way around and that no protective-film tab is caught in a join.
Add the sides with gentle, even pressure
Attach one side panel at a time. Support the panel with both hands and press only where the fixing points meet. Pressing in the middle of a large acrylic sheet can create flex, which is exactly what you want to avoid.
Once both sides are in position, check the corners before moving on. They should sit squarely and evenly, with no panel leaning inward or outward. Small alignment issues are easier to correct now than after the top panel is fitted.
Fit the front and top last
The front panel is usually the piece you will handle most while placing your model, so keep its protective film on for as long as practical. Fit it gently, then add the top panel once all upright pieces are properly aligned.
A top panel should settle into place with light, even pressure. If it seems tight, do not push harder. Recheck each corner and make sure the side and rear panels are fully seated. Precision-cut acrylic rewards patience, not brute force.
When the structure is complete, remove the remaining protective film slowly. Pull it back at a low angle rather than sharply upwards. This reduces static and makes it easier to keep control of the panel.
Moving Your LEGO Set into Its New Display
For smaller models, lift the set from underneath using its strongest built sections. Avoid gripping wings, antennas, flags, railings or delicate minifigure accessories. For a large build, particularly a substantial Star Wars, Technic or modular set, it is often safer to move it in sections or ask another person to steady the base.
If your display case includes a set-specific base, use the intended placement points as your reference. The set may be designed to sit at a particular angle or distance from the backdrop for the best view through the front panel. Centre the model before making final adjustments to figures, vehicles and accessories.
This is also the moment to decide what story the display should tell. A helmet collection may look strongest with clean, even spacing. A battle scene can benefit from a more dynamic arrangement, with minifigures turned towards the action. The case protects the build, but the composition is what makes it feel like a centrepiece.
Keep Fingerprints, Static and Dust Under Control
Acrylic has a brilliant glass-like clarity, but it needs the right care. Never use kitchen roll, tissues, rough cloths or household glass cleaner. These can leave fine scratches, residue or haze that dulls the surface over time.
Use a clean microfibre cloth for light dusting. For a stubborn fingerprint, lightly dampen the cloth with clean water and wipe gently, then dry with a separate soft cloth. Spray liquids onto the cloth rather than directly onto the case, especially around printed bases and panel joins.
Static can attract dust after the protective film comes off. This is normal, especially in dry rooms. A soft anti-static acrylic cleaner can help, provided it is suitable for acrylic and used sparingly. Avoid alcohol-heavy products, ammonia-based cleaners and abrasive polishes.
For everyday maintenance, a quick gentle wipe of the exterior every few weeks is usually enough. The real advantage of a fully enclosed display is that your build itself needs far less cleaning. No more carefully brushing dust from cockpit controls, castle turrets or tiny printed tiles before every photo.
Common Assembly Problems and Simple Fixes
If a panel looks cloudy, inspect both sides before assuming there is a flaw. The protective film is sometimes so clear that it is easy to miss. Look for a small tab near an edge and remove it slowly.
If the case does not sit flat, check your surface first. A slightly uneven shelf can make a perfectly assembled case appear twisted. If the surface is level, carefully loosen the affected panel and reseat it rather than pressing down on the top.
A gap at a corner usually means one panel has not fully entered its groove or connector. Take the top panel off if necessary, align the sides and rear again, then refit the top. Trying to hide the issue by forcing the corner together risks scratching the acrylic.
If dust gets inside during assembly, do not panic. Lift the relevant panel carefully, use a microfibre cloth or soft blower to clear the area, and reseat it. It is worth spending an extra minute here. A speck of dust becomes far more noticeable once the case is under display lighting.
Give the Finished Display the Space It Deserves
Once assembled, place your case away from direct sunlight, radiators and high-traffic edges where it could be knocked. UV exposure and heat are not ideal for LEGO elements, printed parts or display artwork over the long term. A stable shelf, cabinet or dedicated display unit gives both the case and the build the best chance of looking exceptional for years.
Consider the viewing height, too. Larger sets often look best around eye level or slightly below, while compact helmets, BrickHeadz and minifigure displays can create serious impact when grouped at different heights. A single case can protect a model. A thoughtfully arranged collection can bring an entire theme to life.
Brixbox cases are made for that final, rewarding moment: the build is complete, the dust is kept at bay and your favourite set is no longer just stored on a shelf. It is ready to be showcased with the pride it earned, one carefully placed panel at a time.
RECENT POST