LEGO Blog
All the latest Brixbox news, straight from the team.
How to Showcase LEGO Cars Like a Collector
A LEGO car rarely looks its best parked on a bare shelf. The bodywork deserves clear sightlines, the cockpit deserves a closer look, and those carefully applied stickers should not slowly disappear beneath a layer of dust. Knowing how to showcase LEGO cars turns a finished build into a proper centrepiece – whether it is a Technic supercar, an ICONS classic, a Speed Champions grid or a racing legend with serious sentimental value.
The best display is not always the biggest or busiest. It gives the model room to breathe, protects the details you spent hours assembling, and makes the scene feel deliberate rather than simply stored. Start with the car, then build the presentation around its character.
Start with the car’s scale and personality
Before choosing a shelf, case or backdrop, look at what makes the model special. A large Technic Ferrari, McLaren or Peugeot endurance racer needs visual space around its sweeping panels, exposed mechanics and broad rear wing. Cramping it between books or other sets loses the impact of its proportions.
Smaller Speed Champions cars have a different strength: they look fantastic in groups. A row of classic racers, a manufacturer collection or a complete motorsport line-up creates the feeling of a private garage. The trade-off is that smaller models can look lost on a deep shelf, so use a shallower display area or raise them slightly with stands to keep them visible.
Colour matters too. A red supercar can vanish against a loud red backdrop, while a dark vehicle may need a lighter printed base or background to define its silhouette. Think of the display as a frame for the build, not another build competing for attention.
How to showcase LEGO cars with the right case
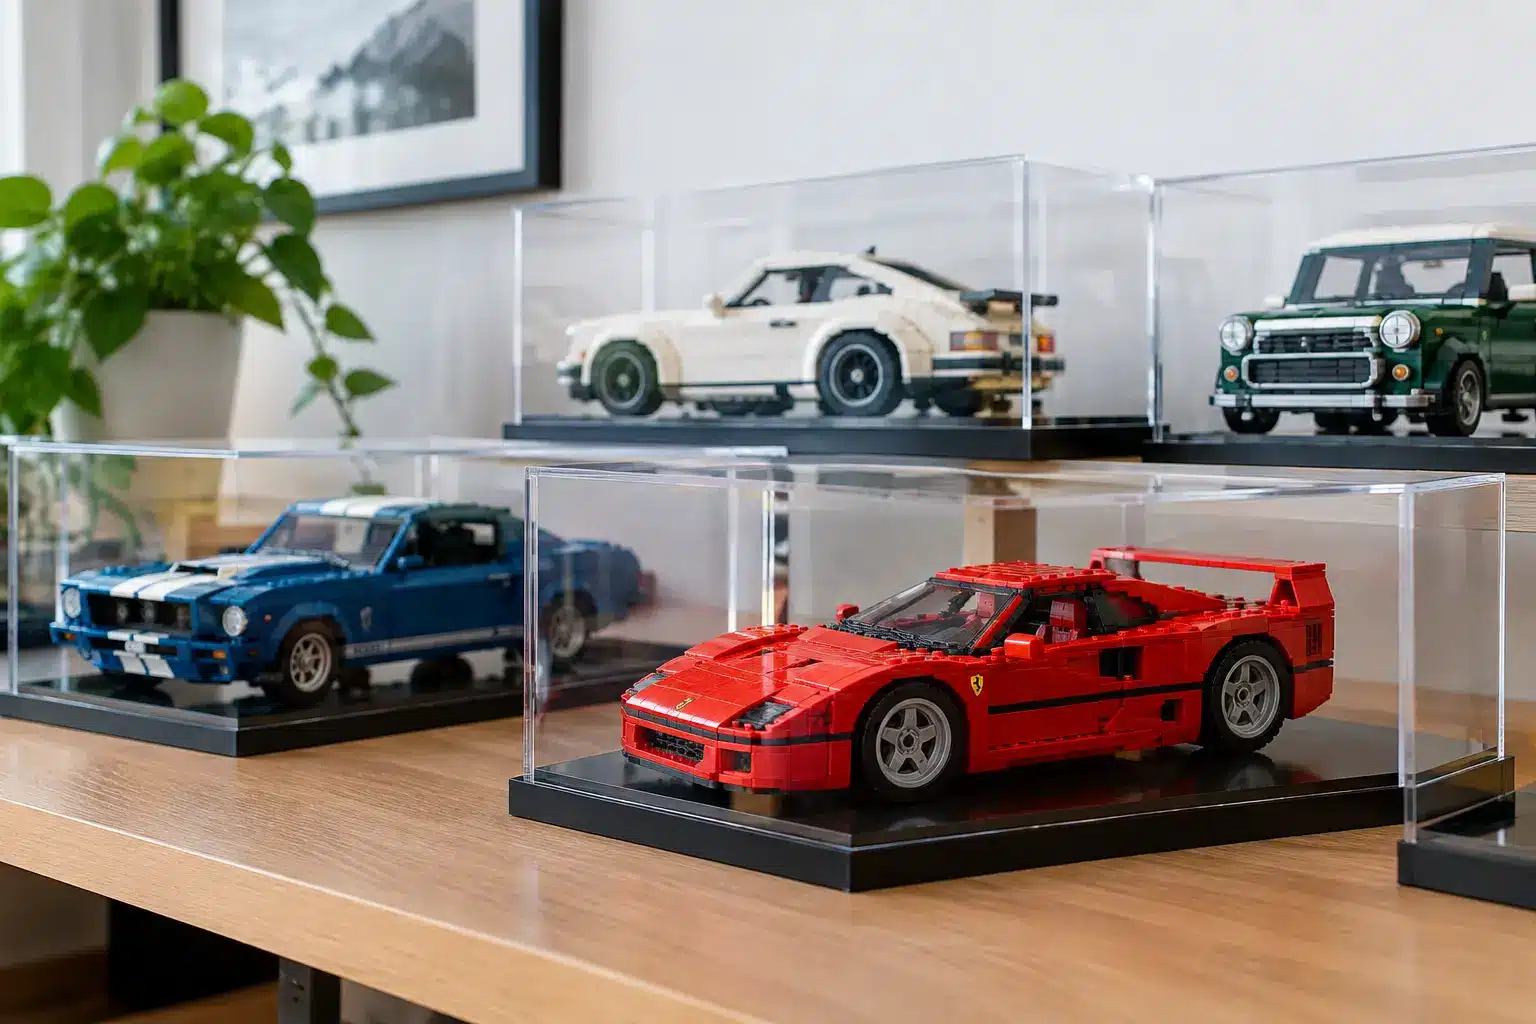
For collectors who want a clean, long-term display, an acrylic case is often the strongest starting point. It creates a clear boundary between a prized model and everyday life: no accidental knocks while dusting, no curious hands rearranging a delicate spoiler, and far less dust settling into wheel arches, grilles and open cockpits.
Set-specific cases are worth considering for larger and more detailed models. A close, purpose-built fit avoids the empty look of an oversized generic box while leaving enough clearance around mirrors, antennas and raised elements. It also helps the display feel intentional, particularly when the case includes a matching printed base.
Choose the case depth with the viewing angle in mind. Cars are designed to be admired from the front three-quarter angle, where the bonnet, side profile and wheels work together. If your display sits at eye level, a deeper case lets you turn the car slightly rather than presenting it dead straight. On a high shelf, however, a straight-on arrangement may show the roofline and bonnet more effectively.
A premium case also makes a practical difference for white, light grey and sticker-heavy builds. These models tend to reveal dust and marks quickly. Protection is not merely about keeping a collection tidy – it preserves the crisp finish that makes a completed car feel new.
Create a scene, not just a parking space
A great car display gives the model a sense of place. That does not mean adding every spare minifigure, traffic cone and accessory from your collection. A few considered elements are more convincing than a cluttered garage scene.
For a road-going supercar, a dark printed base can suggest a showroom floor, while a clean architectural backdrop lets the paintwork take centre stage. A motorsport model benefits from pit-lane markings, racing-inspired graphics or a finish-line atmosphere. Classic cars often suit a more restrained setting: neutral tones, a heritage-style print or a simple plinth that lets the shape do the talking.
Printed backgrounds are particularly effective when a car is displayed alone. They add depth without taking up extra shelf space, and they stop a pale wall from making the model feel unfinished. The key is choosing artwork that supports the set’s identity. A race circuit suits a Le Mans-style machine; it is less convincing behind a vintage pickup.
If you are displaying several cars together, keep the scenery consistent. One unified background and matching bases make a mixed collection feel curated, even if it includes everything from a Formula 1 car to a retro muscle car.
Get the height, angle and spacing right
The shelf itself can make or break the display. Cars placed too low become furniture-level scenery. Cars placed too high are viewed from underneath a shelf above. The most satisfying position is usually between waist and eye level, where you can appreciate both the bodywork and the interior without moving the model every time.
Leave a little negative space around each vehicle. On a crowded shelf, wheels, wings and body colours begin to merge into one visual block. A single large Technic car deserves enough width to read as a statement piece. With smaller cars, keep a consistent gap between models so the collection appears organised rather than squeezed in.
Angle is another collector detail that pays off. Turn one car by a few degrees to reveal its best lines, but avoid a line-up where every model points in a different direction. For a race grid, use a disciplined formation. For a garage or showroom arrangement, stagger the cars subtly, with one hero model at the front and supporting builds behind it.
If your shelf is deep, a raised rear row helps. Low acrylic risers or stepped stands ensure the cars at the back do not disappear behind the front tyres and spoilers. Just make sure every model remains stable, especially if the shelf is near a door, on a busy wall or close to a speaker.
Use lighting to reveal the build, not wash it out
Lighting brings out the engineering in LEGO cars: brake discs behind the wheels, curves in the body panels, the texture of tyres and the contrast between glossy elements and matte pieces. It is also one of the easiest ways to make a modest display look far more premium.
Warm white lighting suits most collections because it feels like a showroom rather than a clinical cabinet. Position LEDs above or slightly in front of the car to highlight the bonnet and windscreen. Side lighting can look dramatic, but it may create harsh shadows over cockpit details.
Avoid placing a display in direct sunlight. UV exposure can fade colours over time, particularly on bright red, yellow and blue elements. Sunlight also makes acrylic surfaces harder to view because of reflections. A well-lit room with controlled artificial light is usually the better choice.
For cases with printed backgrounds, test the light from your usual viewing position. A dramatic backdrop is only effective if glare does not hide the artwork. It may take a small adjustment to the light angle to get the crisp, photographed look collectors want.
Build a collection people can read at a glance
The strongest LEGO car displays tell a clear story. You might group by manufacturer, era, racing discipline, colour or scale. There is no single correct approach, but a theme gives the collection purpose and makes future additions easier to plan.
A Ferrari-focused shelf can pair modern supercars with a classic race car. A motorsport display might move from rally to Formula 1 to endurance racing. Alternatively, a colour-led arrangement of reds, silvers and blacks can feel remarkably polished in a living room or office where you want the collection to complement the space.
Be realistic about expansion. If you know more cars are on the wish list, avoid filling every centimetre now. Leaving one deliberate gap can make the display feel less crowded and gives your next build a place to arrive. Rotating models seasonally is another smart option when shelf space is limited – it keeps the display fresh without forcing a permanent choice between favourites.
Keep the presentation collector-ready
Even a protected display needs occasional attention. Use a soft microfibre cloth on the outside of acrylic panels and follow the material care guidance for your case. Avoid rough paper towels, which can leave fine scratches and dull the clear finish over time.
Before enclosing a car, check for loose pieces, crooked stickers and fingerprints on windscreens or transparent elements. This is the moment for the small adjustments that are easy to ignore on a worktable but immediately noticeable in a display case. If you use lighting, keep cables neat and out of the main sightline so the illusion remains intact.
For cars you rebuild, photograph or handle regularly, a display stand may suit better than a fully enclosed case. Stands make access simple and can show off a dramatic angle, but they offer less protection from dust. It depends on whether the model is primarily a showpiece or part of an active, changing collection.
Brixbox display cases, themed printed bases and backdrops are designed for collectors who want the finished build to feel as special as the build process itself. Give each car the space, protection and setting it deserves, and every glance at the shelf becomes a reminder of why you chose to build it.
RECENT POST