LEGO Blog
All the latest Brixbox news, straight from the team.

How to Choose LEGO Display Stands for Your Sets
A finished LEGO set should not disappear into a crowded shelf the moment the final brick clicks into place. The right stand can lift a starfighter into flight, give a helmet the presence it deserves, or turn a favourite vehicle into the focal point of the room. Knowing how to choose LEGO display stands comes down to more than finding something that holds a model up. It is about matching the support, angle, scale and finish to the story your build is meant to tell.
For collectors, that difference is huge. A generic acrylic riser may create height, but a purpose-designed stand can make a set look as though it belongs in a gallery of its own.
Start with the set, not the shelf
The best display stand begins with the exact model you own. LEGO builds vary enormously in weight distribution, connection points and footprint. A compact Speed Champions car needs a very different solution from a large Star Wars starship, a Technic supercar or a detailed Hogwarts display piece.
Check the set number before anything else. A stand designed around a specific set has been planned for its dimensions, underside geometry and centre of gravity. That means the model is supported where it needs support, rather than balanced precariously on a one-size-fits-all platform. It also helps preserve the clean lines of the build, without awkward clips or visible supports stealing attention from the model itself.
This is especially valuable for sets with moving elements, delicate wings, long overhangs or uneven bases. If your build has a heavy rear section, a tall upper structure or a low-slung body, an unsuitable stand can place strain on parts that were never intended to bear its full weight.
A display stand should feel like part of the presentation, not a compromise made after the build was finished.
Choose the display angle with intention
Height is useful, but angle creates drama. Tilting a spacecraft upwards can suggest launch or flight. Raising one side of a vehicle can reveal wheel detail and bodywork usually hidden at shelf level. Even a subtle incline can make a familiar set feel completely new.
The right angle depends on what you want to see. For a large ship, consider whether the stand reveals the cockpit, underside details or the distinctive silhouette. For cars and motorcycles, think about which side carries the strongest design details. A front three-quarter view often feels dynamic, while a side-on display may show off a long wheelbase or iconic livery.
There is a trade-off. A steeper angle is more dramatic, but it also needs more secure engineering and may demand extra clearance above or behind the set. Before choosing, measure the full display space, not just the shelf depth. Include the model at its intended angle, plus room for any antennae, wings, rotors or extended accessories.
For collectors who like to photograph their builds, an angled stand is often the difference between a quick shelf snapshot and a genuinely striking display. Light catches the model differently, details become more visible and the set gains a sense of movement without changing a single brick.
Check support points and stability
A great stand should make your set look weightless while remaining completely dependable. This balance comes from intelligent support points, a stable base and material thick enough for the set’s size.
Look closely at where the model will connect to the stand. Purpose-built designs generally use attachment points that work with the LEGO build itself, helping to spread weight rather than concentrating pressure on one fragile section. For heavier premium sets, this matters far more than it might for a small display model.
The base deserves equal attention. A narrow base may look minimal, but it is not always the right choice for a wide, high or forward-leaning model. The stand should remain steady when positioned on a solid shelf and when you gently clean around it. If a set is displayed where people regularly pass by, a secure, low-risk setup is worth prioritising over the most extreme pose.
Acrylic stands are particularly popular because they keep the focus on the model. Their clean, crisp appearance works across themes, from the polished curves of a Technic car to the battle-worn presence of a Star Wars ship. Quality matters here: neatly cut, properly finished acrylic gives the whole display a premium feel, while flimsy material can undermine even the most impressive build.
Decide whether a stand is enough
Display stands and display cases do different jobs. A stand is ideal when your main goal is elevation, movement and a stronger viewing angle. It is an excellent choice for a shelf that is already relatively protected, or for a model you want to enjoy from every side without an enclosure between you and the build.
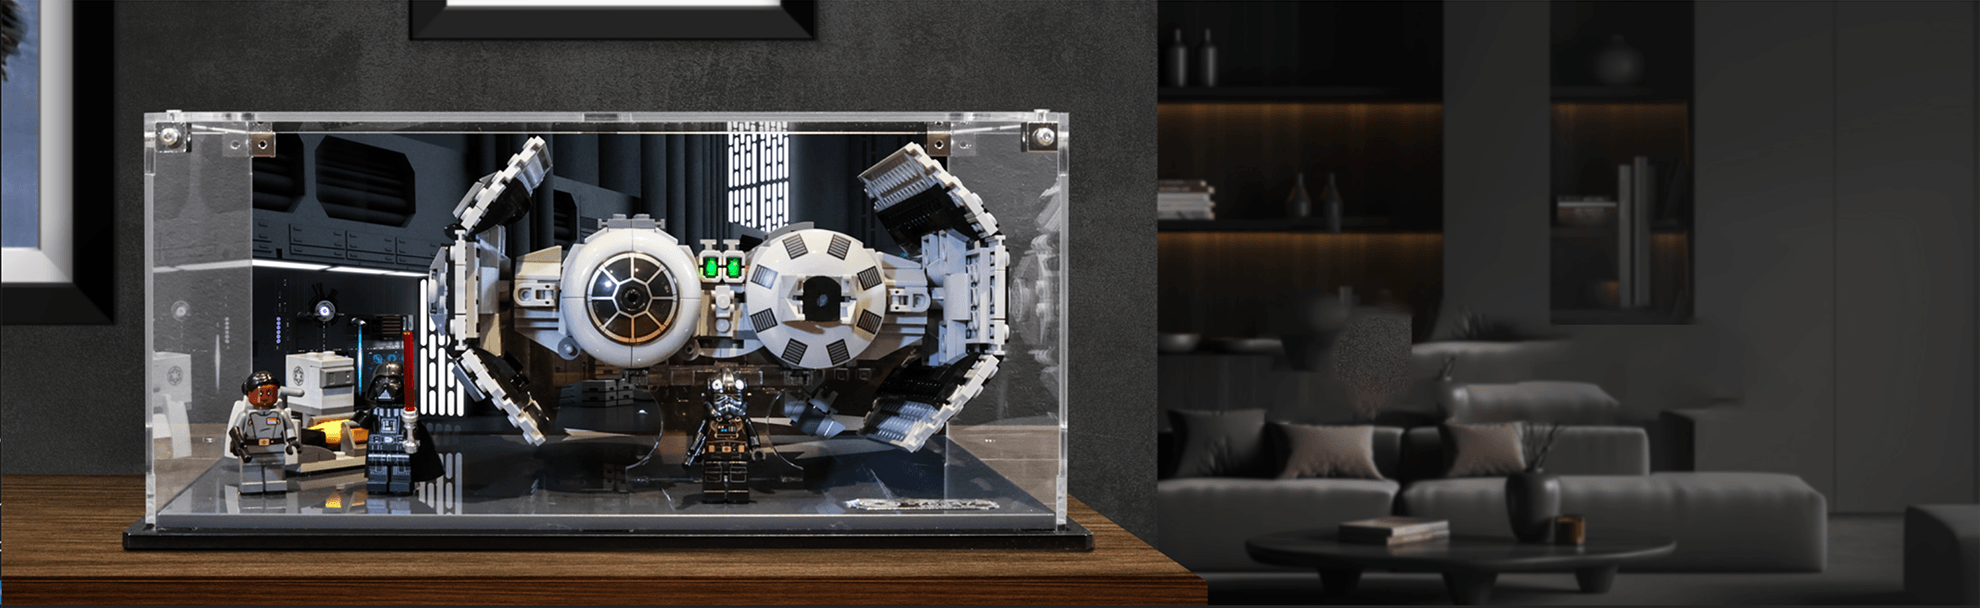
A display case becomes the better option when dust, pets, sunlight exposure and handling are regular concerns. Large or intricate sets can collect dust in places that are frustrating to reach, particularly around greebling, exposed studs, wheel arches and minifigure-scale interiors. A case provides a more complete layer of protection while still allowing the display to feel deliberate and polished.
You do not always have to choose one or the other. Some collectors use stands to create the pose, then place the elevated model inside a case. This works brilliantly for premium centrepiece sets, especially where a printed base or themed background can add depth without adding clutter.
Think about the role of the model in your collection. Is it a set you rebuild, move and handle often? A stand may be the simpler answer. Is it a long-term centrepiece you want to preserve in pristine condition? A tailored case and stand combination may earn its space.
Match the stand to your display style
The stand should support the visual language of the set and the room around it. Clear acrylic is versatile because it keeps attention on the LEGO model, but the presentation can go much further.
A printed base can ground a model in its world, whether that means a hangar-inspired scene for a starship, a road-style surface for a supercar or a themed setting for a magical build. UV-printed backgrounds can add atmosphere and scale, giving the set a more immersive finish without asking you to create a full custom diorama.
Restraint still has its place. If you display several sets together, too many competing backgrounds can make the shelf feel busy. In that situation, coordinated clear stands or matching base styles may create a cleaner, museum-like look. Let your most significant set take the theatrical treatment, then use the surrounding models to build a coherent collection around it.
This is where set-specific presentation really shines. It recognises that an X-wing, a Formula 1 car and a BrickHeadz character are not simply objects of different sizes. They invite completely different ways of being displayed.
How to choose LEGO display stands for growing collections
When working out how to choose LEGO display stands for more than one set, plan the shelf as a collection rather than a series of individual purchases. Varying heights can stop the display looking flat, but every model does not need to be elevated. Use stands for the builds that benefit most from angle and visibility, then allow lower models or minifigure displays to create visual rhythm around them.
Measure spacing between sets as carefully as the dimensions of each stand. LEGO collections grow quickly, and a display that is packed tightly from day one leaves no room for new favourites. A little negative space makes premium builds look more intentional and makes dusting far less stressful.
It is also worth considering access. If you regularly rearrange your shelves, choose solutions that let you lift or remove a set confidently. If the model is going into a high cabinet or a permanent display wall, prioritise stability and protection instead. The best answer depends on whether your collection is evolving weekly or settling into its final form.
Avoid the common shortcuts
The cheapest stand is not always the best value if it leaves a prized set unstable, poorly angled or visually underwhelming. Likewise, do not choose solely by maximum height. A taller stand may obscure other models, push a build too close to the top of a cabinet or expose an underside that is less finished than the side you meant to showcase.
Avoid forcing a model onto a stand made for a different set simply because the dimensions look similar. Two builds can share a footprint yet have completely different weight distribution. Set-specific compatibility is not a minor detail when you are displaying a model you have invested time, money and care into.
Finally, do not treat the stand as an afterthought. The build may be complete, but the display is not. Choose a stand that respects the engineering, reveals the details you love and gives your collection the kind of presence that makes you stop for one more look every time you walk past.
RECENT POST